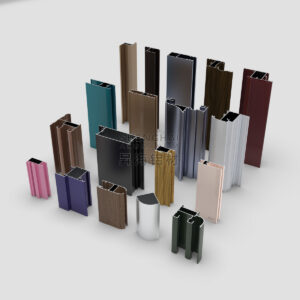
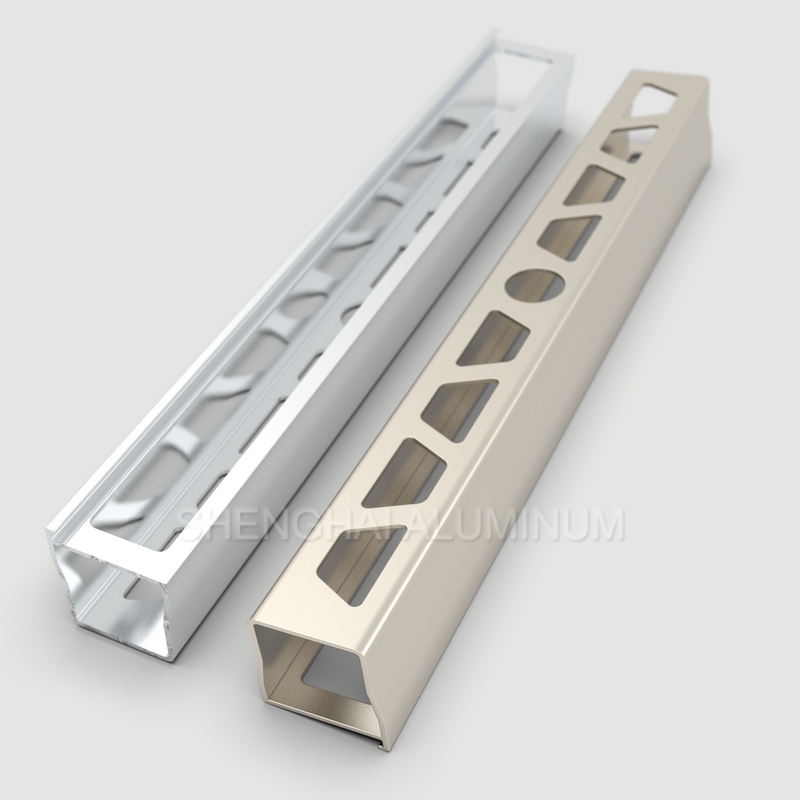
Why Choose Aluminum Extrusion Profile as Your LED Light

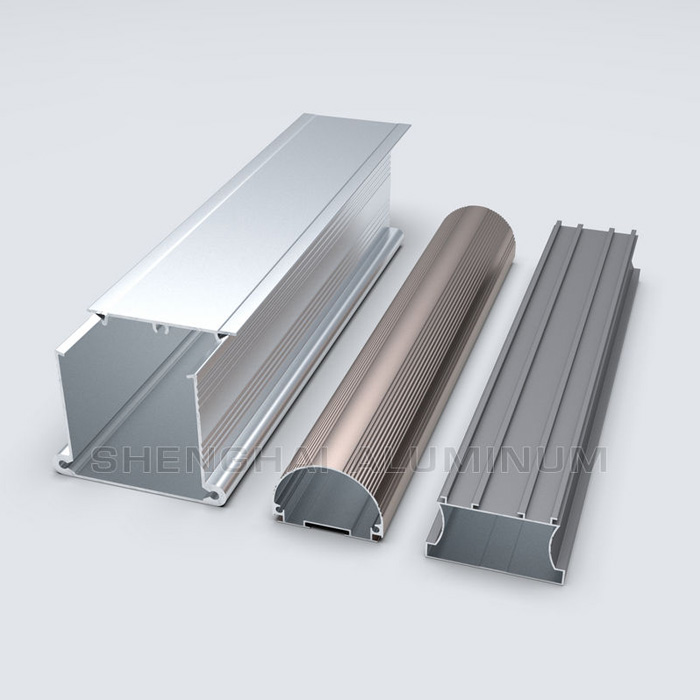
LED lighting aluminum profiles are usually made of 6063-T5 alloy aluminum material, which has excellent processing properties and good strength, hardness and corrosion resistance. At the same time, its small density and high thermal conductivity make it one of the ideal materials for housing LED lights.

The shape of the extrusion aluminum LED light is usually rectangular or round, which can be customized and processed according to different application requirements to suit different sizes, shapes and installation methods. At the same time, LED light aluminum profiles can be treated with a surface coating or anodizing to improve their surface hardness and corrosion resistance and increase their aesthetic appearance.

LED light Aluminum profile

LED light: Aluminum profile VS Stainless steel

Compared with stainless steel, high-power LED lights are now generally made of aluminum, including die-casting aluminum, car aluminum, stretch aluminum, etc. Aluminum has the following advantages over steel.

  1. LED light needs good heat dissipation materials, and aluminum thermal conductivity is much larger than steel.
  2. aluminum profiles are easy to process. Many stores can be processed easily to take materials.
  3. aluminum surface has a layer of dense aluminum anodized, which has a good anti-corrosion effect.
  4. Finally, aluminum is more reasonably priced than stainless steel, which is more cost-effective.

The production process of aluminum profiles includes aluminum ingots through hot melt casting rods, alloy grades including 6061, 6063, 6005, and 6082, through the opening of extrusion dies, heating aluminum rods, dies, hot state extrusion, to get aluminum materials with different cross-sectional shapes, and then aging heat treatment. The production process of aluminum profiles mainly includes four processes: melting and casting, extrusion, machining and surface treatment. Machining includes fine sawing, punching and cutting, CNC number milling, bending and welding, etc. Surface treatment provides vibration grinding, wire drawing, polishing, sandblasting, anodizing, liquid painting, powder coating, electrophoretic painting, wood grain transfer and other processes.

In the design and production process of extruded aluminum LED lighting, factors such as heat dissipation effect, easy installation, beautiful appearance and reliability need to be taken into consideration to ensure that they can meet the needs and requirements of customers in the process of use.

Customized Industrial T Slot Aluminum Profile Frame

T slot aluminum frame is an extension of the industrial aluminum profile that is widely used. It can be used for the manufacture of various equipment supports and load-bearing skeletons. High-quality industrial aluminum profiles are characterized by their light quality and good corrosion resistance. So, what are the characteristics of an industrial aluminum frame made from aluminum slot profile?

T slot aluminum frame

T Slot Aluminium Frame

  1. Reasonable structure and high flatness
    A good quality slotted aluminum frame should have a reasonable structure, and the surface should be flat and free from unevenness. Only when these standards are met will the industrial aluminum frame be evenly stressed, have a good service life and avoid the phenomenon of bending and deformation.

2.Appearance of the color is uniform and beautiful
The overall color of the qualified industrial aluminum frame is uniform, which requires users to distinguish well before purchasing. The good quality industrial aluminum profile frame is usually after the surface treatment; common colors are silver, white, black, gold, stainless steel, etc. If the use of recycled aluminum production of aluminum profile frame is likely to appear on the surface of dark and uneven colour cleaning, the appearance of industrial aluminum profile frame is a beautiful premise is the need to use the quality of qualified aluminum profiles to build.

3.Connection parts are precise and no large gaps
Aluminum slot profile frame is generally connected through industrial aluminum profile accessories. It is usually connected using the overall structure. Qualified industrial aluminum profile frames have specific connection parts and small gaps.

4.Stable structure and high safety
A well-built aluminum extrusion t slot frame is safe and stable, does not shake, and has a good load-bearing capacity. Suppose you want to obtain good stability in the initial customization program. In that case, you must remember to choose a suitable aluminum profile type and a reasonable frame structure. You need to regularly check whether the connection parts are loose after the installation is completed.

How to Use Aluminum Edge Trim Strip

Types of Aluminum Edge Trim

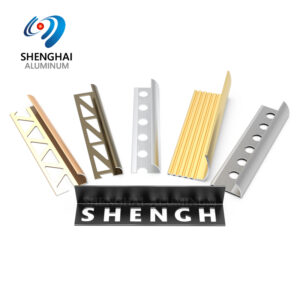
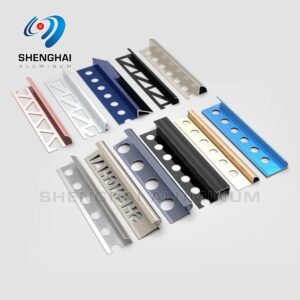
Aluminum Trim strip (also called trim buckle, trim crimp), used for flooring, wall trim, play a decorative, beautifying role.
The role of the buckle strip is the floor in the case of seams, the required cover buckle strip.
In addition, in order to prevent the height difference from tripping, so it is used to press the edge of the floor with the aluminum trim strip, made of slope, common ground junction.

china luminum Edge Trim supplier

What styles are commonly used for aluminum edge trim

The first thing we need to make clear is that the size, color and shape of metal decorative lines can be customized. Metal trim strip used in wall and ceiling molding are common: U-shaped, flat, T-shaped, Hat shape and L-shaped.

  1. U-shaped aluminum edge trim
    U-shaped aluminum edge trim can only be made to measure 20mm, but the finished products can reach about 5mm (depending on the situation), and there are two kinds of situations: U-shaped with two equal sides and U-shaped with two different lengths.

The U-shape with two equal sides is used for the plane with no height difference between the left and right sides, so you can buy the finished products or customize them by measuring the length on site. The U-shaped aluminium edging trim with inconsistent lengths on both sides are often used in modeling closures with height differences between the left and right sides, and because of the uncertainty of height differences, most of them need to be measured and customized on site.

  1. Flat metal aluminum edge strip
    Flat metal edge are not used much, there are completely flat ones, and there are also the ones with ground edges on both sides (the ground edges are often used in the surface of wood finish), and the common widths are 10mm, 15mm, 20mm and 35mm.

1)Used for ceiling cove

Flat aluminum edge strip are often used in the ceiling cove or directly attached to the wood veneer.
However, because the coating at the recess is not good for construction, it is often replaced by U-shaped aluminum trim strip (if it is a deep recess, the wide stainless steel sheet is usually used, such as stainless steel sheet commonly used in the drop ceiling with the width of 200㎜).

2)Use in wood finish
If it is used on the wood veneer (wall molding or cabinet door), it has the hidden danger of loosening, so it is not commonly used and not recommended, and the operation is as follows.
① Glue: Apply glue dots on the back of the line.
② Paste: Paste the line to the place where it needs to be decorated.
③ Fixing: Fix with adhesive tape until the glue is dry.

china aluminium trim profiles manufacturer
  1. T-shaped aluminum edging
    There are many styles of T-shaped metal lines, the finer the lines, the stronger the sense, in order to increase the stability of the paste, T-shaped metal lines embedded in the part is usually designed into a variety of barbs or serrated shape, the size and style of the following schematic.

T-shaped metal lines are commonly used in: wooden doors, cabinet doors, backdrops, waistlines and wall decorations, etc.

  1. Hat shape aluminum trim strip
    Hat shape aluminum trim channel are also commonly used in: wooden doors, cabinet doors, backdrops, waistlines and wall decorations. Part of the front and back can be used, and the narrowest size of the protruding surface can also be achieved at a minimum of about 5mm.
  2. L-shaped aluminium trim profiles
    L-shaped aluminium trim profiles are often used in the corner of the corner, and can be directly glued on, but they are not recommended to be used easily.

In addition to the above commonly used metal lines, there are many other shapes and sizes, such as beveled and sharp-edged ones, which can be customized.

Do you want to know more about aluminum edge trim strip
You can contact us SHENGHAI Aluminum Manufacturer

Common Surface Treatment of Thermal Break Aluminium

There are many types of methods that need to be taken in thermal break window and door aluminium profile surface treatment. When we are processing, it is very important to adopt an efficient way. So, what are our more commonly used processing methods?

thermal break  window and door aluminium profile
  1. The thermally broken aluminum process is relatively simple, mainly due to the improvement of the automatic accuracy of the leading equipment in the production process, and the microcomputer control of some main technical parameters can be realized, which effectively reduces the difficulty of process operation, and at the same time, the auxiliary equipment is significantly reduced.
  2. Some physical indicators of the coating film are significantly improved compared with other surface treatment films, such as hardness and wear resistance, which can effectively extend the service life of aluminum profiles.
  3. The powder coating is powder coating, and the process is electrostatic spraying. Using the action of the friction spray gun, under the influence of the accelerated wind, the powder particles carry a positive charge when they are sprayed out of the gun body, and contact the negatively charged profile to generate electrostatic adsorption, and then cure at a high temperature, which also enhances the adsorption strength of the coating. Prevent the paint film from falling off.
  4. The labor intensity of workers is significantly reduced. Due to automated assembly line operations, the feeding method and the use of fixtures have been significantly simplified, which improves production efficiency and reduces labor intensity.
  5. The requirements for the surface quality of the wool have been significantly reduced, and the powder coating can completely cover the extrusion lines on the surface of the profile, conceal some of the defects on the surface of the aluminum profile, and improve the surface quality of the finished aluminum profile.
  6. The energy consumption is significantly reduced. In the production process of ordinary anodizing and electrophoretic coating, water and electricity consumption is quite large, especially in the oxidation process. The output current of the rectifier can reach between 8000~11000A, and the voltage is between 15~17.5V. In addition to the heat consumption of the machine itself, it needs to be continuously cooled with circulating water, and the electricity consumption per ton is often about 1000 degrees. At the same time, the reduction of auxiliary facilities can also reduce some power consumption.

China Shenghai Aluminum introduced the standard methods of thermal break aluminium profile surface treatment above. When we are processing, we need to pay attention to these aspects.

What is Aluminum Square Tube Industrial Profile

Speaking of industrial aluminum profiles, many people must know the same. Square tube aluminum profiles are the same, but many materials are called square tubes, so it is a general term. Many people tend to confuse square tubes of various materials. Today, let’s talk about it. Say the square tube aluminum profile in the industrial aluminum profile.

As the name implies, the square tube is a square tube. Various materials can form a square tube. What is the medium used for, and where it is used. Most square tubes are made of steel pipes. After unpacking, It is flattened, crimped, and welded to form a round tube, then the round tube is rolled into a square tube and then cut to the required length. The square tube aluminum profile, which is also the industrial aluminum profile, because its shape is square, so many people will call it a square tube aluminum profile. The difference between it and the steel pipe is the cross section. The industrial aluminum profile The structure inside the cross-section is a bit complicated, and the cross-sections of different models are also different. These profiles are formed by die extrusion, so special profiles can be customized.

Square tube aluminum profile is a popular general term because everyone’s cognition is different. Industrial aluminum profile is often used for frame construction, so you must know what you need when choosing.

What does ‘mill finish’ of aluminum mean?

“Mill Finish” is the natural appearance of the aluminum as it comes from the rolling mill or the extrusion mill. It is “as is” with no external mechanical or chemical finishing. Extruded metal is considered “mill finish”. All aluminum has an oxide of some varying thickness. Anodizing is a very heavy controlled oxide. Anodizing is an electrolytically formed and controlled heavy oxide 0.0003 inches thick on up the 0.002 and on up. Mill Finish is a very lightly oxidized film and will wipe off with your bare finger and immediately form. Rolled sheet would probably have a thinner oxide than hot extruded aluminum. If you want to bond silicone adhesive then you want a phosphate etch, or a light chromate or a thin (.0004 anodize in either chromic, sulfuric, or phosphoric.) If you anodize, do not seal the coating and be sure your anodizer knows you do not want it sealed.

Things You Should Know About Chinese New Year

year-of-the-monkey-2016The 2016 Chinese Lunar New Year will be on Feb. 8 and it is the year of the Monkey. Think Christmas but the date varies based on the lunar calendar, however, it normally falls between mid-Jan to end of Feb.

As important as the Chinese New Year is for those celebrating across Asia and around the world, it should also be significantly important for importers and those working with Chinese manufacturers. The Chinese New Year basically shuts down all production facilities throughout the country and it’s usually much more than a 3-day weekend.

Experienced importers are usually well aware of this time and the delay they can expect for shipments coming out of China around this time. The time is especially crucial for those that have businesses selling seasonal merchandise such as apparel and sporting goods. Failing to implement proper precautions during the Chinese New Year can result in heavy losses for businesses. And the variable date is one of the factors that can usually lead to confusion and planning complexities.

So what do you need to know as we approach the year of the Monkey?

  1. Usually all production and sample development is halted a week to 2 weeks prior to Chinese New Years Eve.
    It’s hard to put it in perspective if you haven’t been in China during this time. Majority of factory workers are going back and forth to their hometowns, combined with families traveling around China to visit relatives.
  2. Production is usually suspended for at least 2 weeks after the Chinese New Year
    While the holiday itself lasts roughly 5 days, most people seize the opportunity and extend the holiday by an extra week or two. So you may not be able to reach someone for 2 weeks or more about your order during this time.
  3. Getting back to normal is sometimes a struggle
    Think about that first Monday after your 2-week long vacation. Well it’s similar in a way and many manufacturers do struggle to get back into normal mode, but they eventually do.

So to recap, the Chinese New Year can turn into a 2-3 week shutdown for most factories and it’s a time of the year where majority of the people in the country are traveling. As a good rule of thumb, importers should do their research on the holiday and proactively schedule their orders and deliveries well before everyone gets in vacation mode.

Also keep in mind that leading up to the Chinese New Year, your supplier is probably rushing to fulfill orders for most of their buyers and get them shipped before they post the ‘We’ll Be Back’ sign on their doors. It is on you as a buyer to ensure that proper quality control standards are met during this time by making sure you hire a local inspector to perform a pre or post manufacturing inspection.

Effect of Aging on Formability of Aluminum Alloys

Formability or workability is generally defined as the amount of deformation that can be given to a specimen without fracture or necking in a given process. Workability is not an intrinsic material property; it depends on design variables:

  • process variables – stress, strain, strain rate, temperature, lubrication, etc., and
  • material variables – size, shape, and amount of second-phase particles, grain size, etc.

Therefore, for a given shape, workability is a function of material and process variables and can be expressed as

Workability = ƒ1 (material) -ƒ2 (process)
where ƒ1 is a measure of the ductility of the material under processing conditions, represented by forming limit criteria developed for various processes. Forming limit criteria based on limiting strains are of practical applicability because strains, as opposed to stresses, are easy to visualize and analyze in workability studies. The ƒ2 function, on the other hand, is given by stress, strain, strain-rate, and temperature histories at the potential failure sites of the work piece.

A complete workability analysis involves:

  • establishment of forming limit criteria (ƒ1) as a function of strain rate and temperature;
  • determination of stress, strain, strain-rate, and temperature histories (ƒ2) at potential failure sites; and
  • comparison of the results of flow analysis (ƒ2) with the forming limit criteria (ƒ1).

This comparison reveals the margin of safety for the deformation processing of a defect-free product. When a negative margin exists, it assists in deciding on the necessary changes in material or process variables, or both.

Free surfaces are the most commonly observed fracture sites in bulk deformation processes. In most cases, free-surface fractures determine the limits of deformation that can be imparted to the deforming material. Such fractures occur at the free surfaces of the specimen during processing, for example, edge cracking in rolling, surface cracking in bending, heading, open-die forging, or surface cracking before contact is achieved between the preform and the die walls in an impression-die forging.

There is developed a fracture criterion, based on limiting strains-to-fracture, for the prediction and prevention of surface cracks in bulk deformation processes. Local strains calculated from measurements, at fracture, of grid markings on the free surfaces of cylinders upset under different friction conditions and with different height-to-diameter ratios, are plotted. Fracture strains obtained from bend tests, measured by grid markings on convex surfaces of bend specimens, fall onto the extension of the fracture line determined by compression tests. Thus, bend tests are complimentary to compression tests, and are particularly useful when compression testing is not feasible.

The material function ƒ1, has not been studied systematically. Recently, has examined the effect of size, shape, and volume fraction of second-phase particles on the bulk formability of American Iron and Steel Institute (AISI) 1040, 1060, and 1090 carbon steels. The present study evaluates the workability of three heat-treatable aluminum alloys as influenced by aging and accompanying structural changes.

Three heat-treatable aluminum alloys (2014, 2024, and 7075) were received in the form of 12.7 mm diameter rods. The 2014 (≈100HB) and 2024 (≈130HB) aluminum alloys were in T4 condition. The 7075 alloy was received in T6 condition (≈150 HB).

Chemical compositions of aluminum alloys:

  • Aluminum alloy 2014: Cu-4.7%; Mg-0.5%; Mn-0.7%; Si-0.6%; Fe-0.3%
  • Aluminum alloy 2024: Cu-4.3%; Mg-1.5%; Mn-0.7%; Si-0.2%; Fe-0.3%
  • Aluminum alloy 7075: Cu-1.6%; Mg-2.5%; Mn-0.2%; Si-0.2%; Fe-0.3%; Zn-5.6%

The degree of banding in the 2014 aluminum alloy was more severe, and the elongated grains were larger near the surface. These large grains at the surface layers caused surface wrinkling during upset testing of the alloy, necessitating machining off a layer of 0.7 mm thickness from the surface in order to bring the wrinkling to an acceptable level. In the 2024 and 7075 aluminum alloys, surface wrinkling was minimal; the original surfaces were preserved during testing.

In order to study the effect of aging on workability, the alloys were solution treated (470-500°C) and aged to four different levels: naturally aged, peak-aged, over-aged, and highly over-aged. Solution treatments were carried out in a tube furnace in argon for the 2014 alloy, and in nitrogen for the 2024 and 7075 alloys. This was followed by quenching in an ice-water mixture.

Tests for the naturally aged condition were carried out after aging the specimens at room temperature (25°C) for one week. An oil bath was used for artificial aging. No recrystallization was detected after solution or aging treatments.

The 2024 aluminum alloy shows greater workability than the 2014 and 7075 alloys in all conditions. While the workability index in the 7075 alloy is improved ≈50 percent by over-aging, improvement in workability levels in the 2000 series is more pronounced. In these alloys, the workability index in the highly over-aged condition is approximately three times that of the naturally aged condition.

Upset test specimens of the 7075 alloy revealed exclusively 45-deg cracks in all conditions. The 2014 aluminum alloy specimens also showed 45-deg cracks, except in the highly overaged condition, where cracks in ≈20 percent of the specimens were vertical (also known as normal). These vertical cracks were randomly located on the fracture line.

In the 2024 alloy, both vertical and 45-deg cracks were observed in all conditions; in general, specimens with low aspect ratios tested under high friction conditions gave vertical cracks. The percentage of specimens containing vertical cracks increased with increased aging time. In the naturally aged condition, only ≈15 percent of the specimens had vertical cracks. This type of crack was seen in ≈20 percent in peak-hardness specimens and ≈50 percent of those in the over-aged conditions. In the highly over-aged condition, though, ≈90 percent of the specimens exhibited vertical cracks. It is clear that 45-deg cracking is the predominant fracture mode at low workability levels in this alloy.

The 45-deg cracks did not penetrate the cross-section of the specimens in the 2000 series alloys. Cracks in the 7075 alloy, however, generally traversed the cross-section of the specimen; there was no indication that cracking started in the center of the specimens.

In the three alloys, the poorest bulk workability was obtained in the naturally aged and peak-aged conditions, where the precipitated particles were small and sharable. Localization of shear in these conditions in heat-treatable aluminum alloys is well documented. Localization of shear and accompanying voiding in the 7000 series aluminum alloys has been studied and co-workers and Leroy and Embury.

Chung and co-workers observed the occurrence of localized shear failure in 7075-T4 aluminum alloy before the onset of necking and concluded that either deformation softening or negative strain-rate sensitivity was necessary for localization to occur. The degree of localization in overaged conditions, however, should be lower than that in the naturally aged condition, as evidenced by the small improvement in the workability level.

Results of tension and compression tests on 2014 alloy indicate that lack of shear localization in tension is not a guarantee that this phenomenon will be prevented in compression. In the compression of overaged specimens of this alloy, only 45-deg cracks are observed, and the persistence of localized shear failure is probable. It appears that the 2024 alloy is least affected by shear localization among the three alloys, as evidenced by the high degree of workability and occurrence of vertical cracks in all conditions.

Annealing of Aluminum and Aluminum Alloys

Work hardening is used extensively to produce strain-hardened tempers of the non-heat-treatable alloys. The severely cold worked or full-hard condition (H18 temper) is usually obtained with cold work equal to about 75% reduction in area. The H19 temper identifies products with substantially higher strengths and greater reductions in area. The H16, H14, and H12 tempers are obtained with lesser amounts of cold working, and they represent three-quarter-hard, half-hard, and quarter-hard conditions, respectively.

A combination of strain hardening and partial annealing is used to produce the H28, H26, H24, and H22 series of tempers; the products are strain hardened more than is required to achieve the desired properties and then are reduced in strength by partial annealing.

A series of strain-hardened and stabilized tempers – H38, H36, H34, and H32 – are employed for aluminum-magnesium alloys. In the strain-hardened condition, these alloys tend to age soften at room temperature. Therefore, they are usually heated at a low temperature to complete the age-softening process and to provide stable mechanical properties and improved working characteristics.

Products hardened by cold working can be restored to the O temper, a soft, ductile condition, by annealing. Annealing eliminates strain hardening, as well as the changes in structure that are the result of cold working.

The distorted, dislocated structure resulting from cold working of aluminum is less stable than the strain-free, annealed state, to which it tends to revert. In zone-refined aluminum, this reversion may take place at room temperature. Lower-purity aluminum and commercial aluminum alloys undergo these structural changes only with annealing at elevated temperatures. Accompanying the structural reversion are changes in the various properties affected by cold working. These changes occur in several stages, according to temperature or time, and have led to the concept of different annealing mechanisms or processes. The first of these, occurring at the lowest temperatures and shortest times of annealing, is known as the recovery process.

Recovery

Structural changes occurring during the recovery of polygonization and subgrain formation has been obtained by x-ray diffraction and confirmed with the electron microscope. The electron micrographs may show the change in structure that accompanies advanced recovery. The reduction in the number of dislocations is greatest at the center of the grain fragments, producing a subgrain structure with networks or groups of dislocations at the subgrain boundaries. With increasing time and temperature of heating, polygonization becomes more nearly perfect and the subgrain size gradually increases. In this stage, many of the subgrains appear to have boundaries that are free of dislocation tangles and concentrations.

The decrease in dislocation density caused by recovery-type annealing produces a decrease in strength and other property changes. The effects on the tensile properties of 1100 alloy are shown in Fig. 1. At temperatures through 450°F (230°C), softening is by a recovery mechanism. It is characterized by an initial rapid decrease in strength and a slow, asymptotic approach to a strength that is lower, the higher the temperature.

fig1391
Fig. 1. Isothermal annealing curves for 1100-H18 sheet.
Recovery annealing is also accompanied by changes in other properties of cold worked aluminum. Generally, some property change can be detected at temperatures as low as 200 to 250°F (90°C to 120°C); the change increases in magnitude with increasing temperature. Complete recovery from the effects of cold working is obtained only with recrystallization.

Recrystallization

Recrystallization is characterized by the gradual formation and appearance of a microscopically resolvable grain structure. The new structure is largely strain-free. There are few if any dislocations within the grains and no concentrations at the grain boundaries. Recrystallization occurs with longer times or higher heating temperatures than do the recovery effects described in the preceding section, although some overlapping of the two processes is usual.

Recrystallization depends upon time and temperature. This relationship can be expressed by a rate equation of the type:

1/t = ke-a/T

where t is time, T is the absolute temperature, e is the base of natural logarithms, and k and a are constants.

The constant a is frequently replaced by Q/R, where R is the gas constant and Q is an energy term, similar to an activation energy. Aluminum alloys generally show good agreement with this time-temperature relationship except when secondary reactions interfere, such as the solution or precipitation of intermetallic phases at annealing temperatures.

Composition also influences the recrystallization process. This is particularly true when various elements are added to extreme purity aluminum; almost any added impurity or alloying element will raise the recrystallization temperature substantially. For commercial-purity aluminum and commercial alloys, however, normal variations in composition have little effect on recrystallization behavior. Extensively cold worked commercial alloys usually can be recrystallized by heating for several hours at 650 to 775°F (340 to 410°C).

Grain size is also strongly affected by composition. Generally, common alloying elements and impurities such as Cu, Fe, Mg, and Mn decrease grain size. The effects of elements of limited solubility, such as Cr, Fe, and Mn, are influenced by the compounds they form with each other and with other elements, and by their distribution in the structure.

The recovery process is not accompanied by any significant change in preferred orientation or texture of the deformed metal. However, the new grains formed by recrystallization frequently develop in orientations that differ from the principal components of the deformation texture. This re-orientation has been extensively studied in rolled sheet and varies considerably with the past history and the composition of the alloy.

Recrystallization produces further changes in the properties of the deformed and recovered metal. These continue until annealing and recrystallization are complete. The properties then are those of the original, unstrained metal, except as they are changed by differences in grain size and preferred orientation. In heat treatable alloys, annealing also may be accompanied by precipitation and changes in solute concentration.

Recrystallization is also accompanied by a further decrease in stored energy, as measured calorimetrically, as well as by complete elimination of residual stresses.

Grain Growth After Recrystallization

Heating after recrystallization may produce grain coarsening. This can take one of several forms. The grain size may increase by a gradual and uniform coarsening of the microstructure. This is usually identified as “normal” grain growth.

It proceeds by the gradual elimination of small grains with unfavorable shapes or orientations relative to their immediate neighbors. This occurs readily in high-purity aluminum and its solid solution alloys, and can lead to relatively large, average grain sizes. Such grain growth is promoted by small recrystallized grains, high temperatures, and extensive heating. Some grain coarsening of this type also occurs in commercial aluminum alloys, but it is greatly restricted by finely divided impurity phases and by intermetallic compounds of elements, such as manganese and chromium that slows down the process pin the grain boundaries, and prevent further movement. Generally, these grains grow only at very high temperatures and may attain diameters of several inches.

Apparently, the normal growth-inhibiting effects of elements such as iron, manganese, and chromium are lost or modified at high temperatures, through solution or through changes in particle size and shape. Because of the high temperatures, the few grains that first lose or overcome these restraints grow rapidly and consume other potential growth centers, and in this manner, a few grains of very large size are formed.

In most alloys, high temperatures alone are not the only cause for “giant grains”: A small primary grain size and well-developed annealing texture are other factors that promote this form of grain growth.

Formability Testing of Aluminum Sheet Materials

A larger number of tests have been used in an effort to measure or predict the formability of sheet materials. Many of these have been criticized because of cost, complexity, difficulty in the analysis of data, lack of correlation between laboratory results and field forming performance, etc. Some of these problems may be overcome when test procedures have been standardized and a better understanding of the mechanics of the tests is achieved.

There will always be a need for formability tests. The effect of composition and processing modifications on formability must be determined during alloy development, preferably without resorting to expensive field forming trials in the initial stages.

Tests are often needed in the analysis of field forming problems requiring the comparison of problem lots to a data base. Tests are also needed for quality assurance, especially since it appears that many sheet users are working toward the use of test results as acceptance criteria.

Part of the lack of correlation between laboratory test results and field forming performance is due to a misuse of the test results. This lack of correlation leads to a lack of faith in the test procedures. If such a correlation is to be expected, the strain state of the test must match the strain state in which the failure occurred in the field. One should not expect the results of a drawability test to correlate with field failures which occurred in plane strain tension. This is because micro structural features respond differently to different states of stress, which has been demonstrated for both precipitation and dispersion strengthened aluminum sheet alloys.

Numerous questions arise when formability tests are considered as quality assurance tools or when correlations between laboratory and field results are sought. Tool geometry, lubrication, sample thickness and test procedure have all been shown to influence test results. All of these factors contribute to the between-lab variability, which has been shown to be large, and make data analysis difficult.

All sheet metal forming operations are combinations of stretching, bending and drawing. The formability tests available under each of these categories, which is a two-way flowchart to aid in the solution of metal forming problems or to aid in the screening of materials where forming is critical. When is used as a screening aid during alloy development, tests characterizing performance in all three modes may be necessary.

When a field forming problem is encountered, grid strain analysis (GSA) and the limiting strain curve are used to determine the strain state at failure and to decide if the problem is material or tooling related.

Stretching can be subdivided into uniaxial, biaxial and plane strain modes. There is some question as to whether a microstructure yielding good formability in one of these stretching categories will give good formability in the other categories.

Uniaxial tension

The uniaxial tension test is the only commonly used test for the uniaxial stretching mode. The most commonly used parameters calculated from tension test results are: the yield strength, the ultimate tensile strength, the percent total elongation in a standard gauge length (usually 50.8 mm), the percent uniform elongation and the percent reduction in area. These are commonly referred to as the mechanical properties.

The elongation values depend upon the gauge length used. A more fundamental, gauge length independent measure of ductility is the reduction in area, % RA, which is given by

%RA=[1-(At/Ao)]·100%

Ao, At original and final cross-sectional areas, respectively

The measurement of the final cross-sectional area may be difficult, which has led to another approach to obtaining a fundamental ductility parameter. Elongation surveys consist of measuring the elongation over many gauge lengths and extrapolating to zero gauge length, with this extrapolated value being the fundamental value.

Other parameters can also be calculated from uniaxial tension test results. True stress-true strain data can be fit to the Hollomon equation, where true stress, σ, is given in terms of true strain, ε, the strain hardening exponent, n, and the flow strength, K, by

σ=Kεn

For steel, the strain hardening exponent correlates well with stretch formability. However, for aluminum alloys, the strain hardening exponent alone does not adequately predict formability.

The plastic strain ratio (or normal anisotropy value), r, is often calculated from uniaxial tension test results, and is given by

r=εwt

εw, εt et true width and thickness strains, respectively.

The plastic strain ratio may be calculated at fracture, at a constant strain or plots of r versus longitudinal strain may be made by continuously measuring εw and εt.

The prediction of “formability” in modes other than uniaxial stretching from parameters calculated from uniaxial tension test results, often referred to as “forming indices”, has often been attempted by many persons in the sheet metal forming industry.

Because parameters such as total elongation, uniform elongation, plastic strain ratio, strain hardening exponent, etc., depend upon microstructure, they cannot be varied independently. It is difficult to assign quantitative values to the relative influence each of these will have on formability, although their qualitative effects are easily rationalized. Regression models can be used to predict formability in terms of these parameters, but these models are specific to given forming operations.

In summary, the uniaxial tension test should not be considered a formability test. Although the results will correlate with field failures in the uniaxial stretching mode, few forming operations result in failures which occur in the uniaxial stretching mode. The test should be used to characterize the mechanical properties of the material and to check for proper temper.

Biaxial tension

The hydraulic bulge test yields stress-strain data in the balanced biaxial stretching mode. The advantage of the hydraulic bulge test is that the strain hardening ability of a material at strains approaching those experienced in actual forming operations can be evaluated.

Strain rate sensitivity is a very important aspect of material behavior. When gradients in strain exist, materials which harden with increasing strain rate will distribute deformation more uniformly because additional deformation in areas of high strain rate, such as neck, will require greater stress. Ductility generally increases with increasing strain rate sensitivity and small changes in rate sensitivity may result in significant changes in the distribution of strain.

Strain rate sensitivity has also been measured using the hydraulic bulge test. Two methods have been used to evaluate strain rate sensitivity. The first involves several abrupt changes in strain rate during a single test. The second requires that two tests be performed at different constant strain rates. The results of the two methods have been shown to be comparable.

In summary, the hydraulic bulge test yields information about the strain hardening and strain rate sensitivity characteristics of the material. In addition, the true strain at fracture is measured. This information is not complicated by the effects of friction.

Plane strain tension

Plane strain tension tests, following the work of Wagoner are in the development stage. Currently, the elongation at fracture in the plane strain state can be evaluated for uniaxially loaded samples. This elongation value can be used in conjunction with those from the uniaxial and biaxial tension tests to plot an approximate limiting strain curve.

A method for obtaining a stress-strain relationship in the plane strain state should be sought. This will allow the strain hardening behavior of aluminum alloys to be studied in uniaxial, biaxial and plane strain tension.

It is unclear as to whether the effect of microstructure on strain hardening will be identical in all three stretching modes. It has been shown for some aluminum alloys that factors reducing the strain hardening capacity in the uniaxial and biaxial modes also reduce strain hardening capacity in plane strain. It may be determined that information obtained from the hydraulic bulge test will adequately predict formability in all three stretching modes.

Attempts should be made to correlate plane strain tension test results with simulative formability test results and field forming test results. Until such work is completed and a method for obtaining a plane strain stress-strain curve is developed, the test should not be considered a formability test and should not be widely used.

Limiting dome height

The limiting dome height (LDH) test has been proposed as a laboratory formability test showing good correlation with press formability. Rectangular blanks of various widths are rigidly clamped in the longer direction and stretched by a hemispherical punch. Transverse constraint, varied by blank width and lubrication, controls the amount of material drawing-in. The height of the dome at peak load, which reflects the combined effects of strain hardening characteristics and limiting strain capability of the material, is used as a measure of stretch-formability.

The effect of friction on the dome height must be held constant in order to evaluate the relative stretchability of alloys. In the past, samples have been solvent cleaned and tested dry in an attempt to hold friction constant at a high value. The test should be continued to be performed dry for the plane strain condition, which is of greatest interest, until that method has been developed.